Before & After: How a Designer Created a Backyard Oasis With a New Deck

We all love to take a peek behind the veil and when it comes to interior design it’s fun to see how designers work their magic in their own homes. Last year I shared how we renovated our RV and this year I’m sharing our brand new deck renovation. This was a labour of love and I was involved with every step, from the design to shopping for the new furniture. Here’s how I navigated the challenges and surprises of building my deck along with the finished space.
Before & After


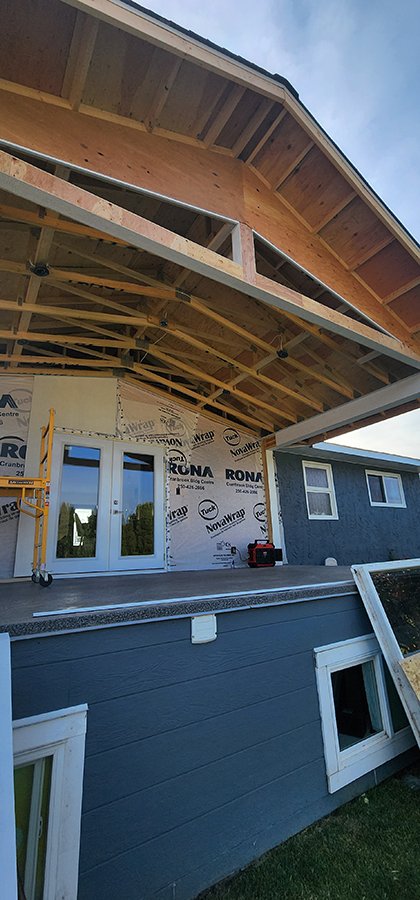
How It Started
So what made me decide this was the time to build a new deck? It started in the same way that many of my client projects begin - one thing leads to another and in this case we needed to replace our roof.
Over 25 years ago my husband built the foundation that the deck sits on. Since we were young and just starting out we couldn’t do an elaborate deck with all the bells and whistles. We knew we wanted a roof over the deck but opted to start with a sun shelter/gazebo instead. We’ve had to replace the gazebo several times and always knew that eventually we’d get the permanent roof constructed.
We really wanted a space that would be good for spring, summer and fall as opposed to just a summertime space. When we decided it was time to replace our shingles we knew the time had finally come to build the structure we’d always dreamed of.
My Wish List

Before we began I sat down and wrote a list of everything we wanted from our future deck. This is a look at my wish list:
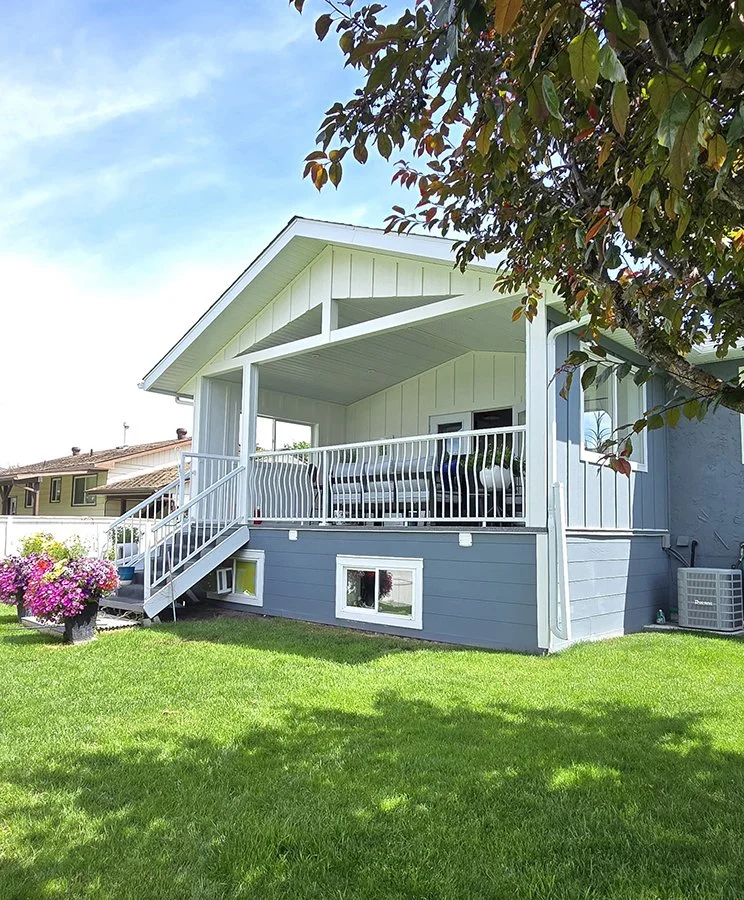
Vaulted Ceilings - we didn’t want to impact the amount of light flowing into our home and we definitely didn’t want to have our home feel dark and dreary during the winter months. A vaulted ceiling allows maximum light to still enter into the interior of our home.
New Siding - we added new siding to both the interior and exterior of the deck. This added some contrast to the existing stucco on the home while respecting the cottage-like aesthetic of the house. I love how casual and comfortable this feels and it seems like it’s always been part of the house.
Recessed Lights - previously we had hung some lighting from the gazebo but having recessed lighting is a game changer. We can extend our time outside well into the evening now and the additional lighting allows this to feel more like an extension of the inside.
Separate and Defined Areas - we wanted to have a seating area for conversations or reading and we also wanted a separate area for dining al fresco. This definition is another aspect that will make your deck feel more like part of your home.
1/ The Planning Stage

Hiring the Team
Since I work so closely with the local trades it wasn’t hard for me to organize the perfect team. The hard part was definitely in deciding which one to choose. I have three contractors that I work closely with and I knew each of them would do an outstanding job.
I approached this the way I advise clients to choose their team and that is by obtaining quotes from all three along with their timeline for getting started. Fortunately all three of my contacts have their own sub trades so I had no worry about having to pull together my own team.
In the end, we decided to push ahead with Brad Bannister at BMK Homes. If you live in the Cranbrook area and are looking for an outstanding team of professionals I can highly recommend them but shout out to Geoff’s Contracting and Joe Bron’s Construction as well. We’re so fortunate to have such great teams working in our area.
2/ The Budget
I began this project as I would any other project and step one was to create a budget. In order to create the budget I needed to understand the cost of materials. These are the areas that we focused on when creating the budget:
Trusses and Engineered Beams

Our main focus was on how to make this deck appear as though it had always been a part of the structure of the house. We didn’t want to look as though this had been added on as a renovation and I think we managed to achieve that. A lot of effort was put into the existing roof line and ensuring that the vaulted ceiling of the deck was seamlessly incorporated into the house.
Roofing Materials
You might be surprised to learn that there’s a wide variety of price points when it comes to roofing materials. I ended up selecting something that is mid-priced and that came with a guarantee that we were comfortable with.
Siding
As I mentioned, we wanted to maintain a casual and comfortable aesthetic with this addition. We chose a board and batten that enhances that overall vibe.
Sliding Windows
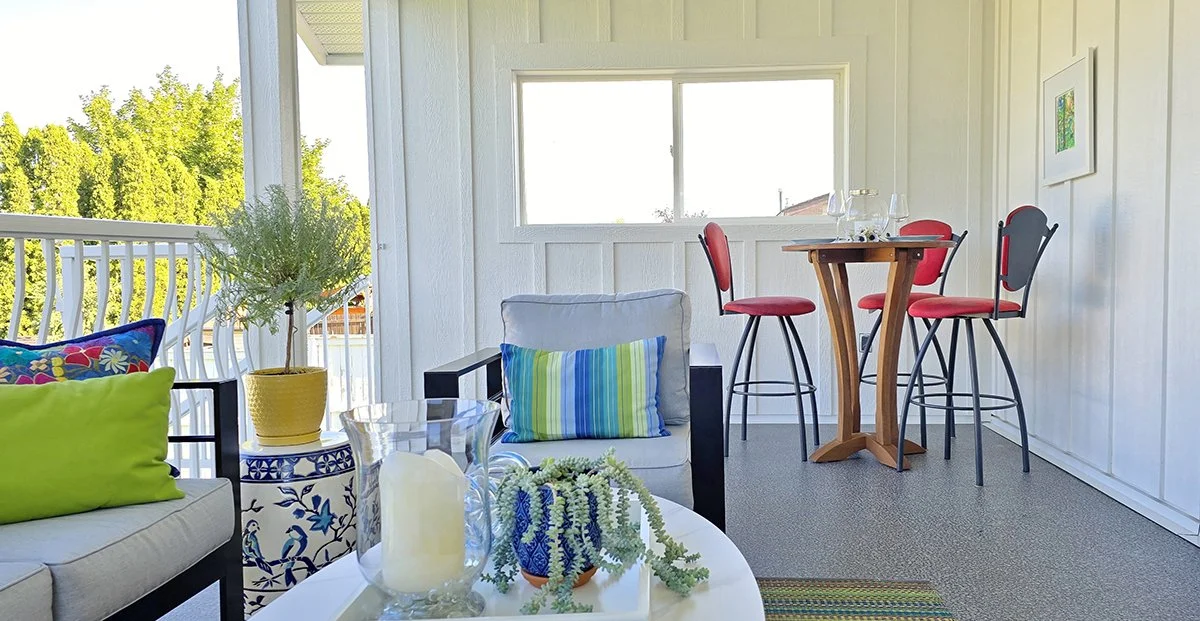
Since we live in an area that reaches above 30 degrees celsius regularly throughout the summer we knew we needed a way to keep the airflow moving on our deck. We decided on sliding windows for the side walls and it’s been a perfect, budget friendly option.
Decking

The vinyl decking was installed a couple of years ago. The reason we selected vinyl is that the room directly under the deck needs waterproof protection against any moisture that may accumulate on the deck over the colder months.
A large portion of the budget when building a deck goes towards labour. It’s important to have a comprehensive budget created by your contractor once you have secured the team. You want to ensure that your vision is realistically captured by your team so that their numbers align with your vision.
3/ Important Considerations for Your Deck
Each of us will have to contend with our budget versus our wish list regardless of what type of renovation we undertake. When it comes to building a deck here are some of the things I think you should consider:
Electrical Outlets
This is such an easy thing to overlook but you’ll be thankful for the attention to it once your deck is complete. There are a lot of reasons to include electrical and whether it’s for plugging in a remote speaker, a tv, adding a small outdoor lamp or for charging your phone while you enjoy the outdoors it’s smart to consider this option early. We previously had one outlet on the deck but during the renovation I added two additional outlets.
Hardwire Lighting
This is such a no-brainer if you’re building a new deck with a roof. There are plenty of lighting options available for outdoors but having it hardwired is the best of all the options.
We had four recessed lights installed into the soffit along with an additional light at the centre of the ceiling. This one is on a dimmer and it’s also set up on a separate switch for maximum control of the lighting.
We aren’t quite sure how that centre unit will be used because we need to live through an entire summer and determine what our needs are. We want to leave the option of installing a fan for temperature control. If we determine that’s not necessary then we’ll install a beautiful chandelier.
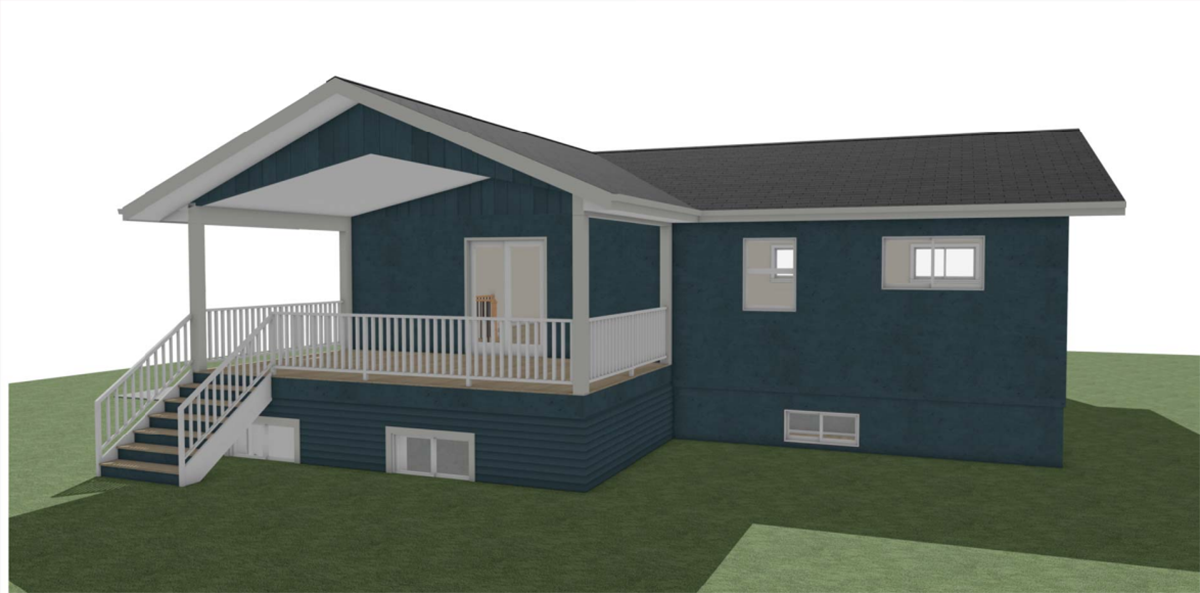
Sun Control

As you can see from the permit drawings above, our original plan did not include accommodation for sun control on the front or sides of the deck. During construction it became apparent that we needed a solution for the intense sun. The deck is west facing and we were getting some intense heat at around 6pm which is exactly when we want to use this area.
Thankfully during construction I was able to brainstorm and revise the plan. We decided to install a beam across the front of the roof in order to attach motorized roller shades.
My window covering supplier is now offering exterior motorized sun screens which I’ll be adding not only to my deck but also to my inventory of window coverings. If you want to learn more about my window coverings business you can read more here.
Privacy

This is one of the most important considerations when building a deck. Nobody wants to be sitting outside fully in plain view of all their neighbours. Regardless of how well you get along, we all need our privacy even when we’re outside.
Before the construction had begun my husband and I recognized that we would prefer to remove the railings around the deck and instead install walls on either side to create additional privacy. We tackled this part of the project on our own and installed these walls this spring.
Door Placement (and Furniture Placement)
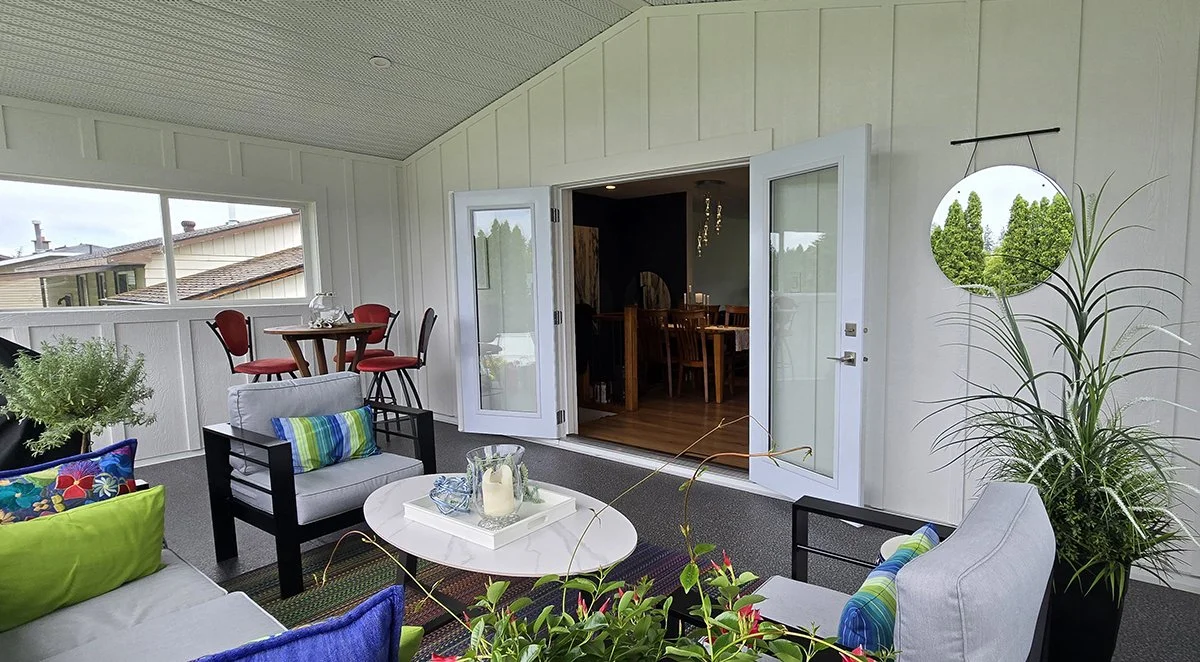
One of the most difficult parts of building, whether it’s indoors or outdoors, is in understanding the connection between all the parts and how they impact the final space. In my case I wanted to change the five foot sliding door that previously existed and instead install garden doors that swing into the deck.
Doors that open into any space should always be factored into the furniture plan because they can potentially block the walkways at best and the functionality of the space at worst.
In our case we hadn’t purchased the furniture for the eating or lounging areas and those doors needed to be considered when determining the correct size and placement of the furniture.
Always factor in the final space when designing so that you don’t get caught with uncomfortable or problematic layouts that leave you feeling disappointed.
4/ Additional and Unexpected Costs
If you've never built a deck you may be surprised at some of the work that has to be done before your new deck can be built. These hidden costs can take a big bite out of your budget so be prepared early with the knowledge of what’s involved.
A few examples of work that must be done before construction can begin includes:
Removing an existing substructure that needs to be torn down
Excavation or landscaping work that needs to be done to level the area
Dealing with access constraints that the building team will need to address
5/ Building Permits

Just as with any interior project a deck requires a local building permit. Your contractor will be responsible for submitting and following up on this with the municipality. In our case it took 5 weeks for the permit to be issued.
Given my experience, tackling permits was a dual effort between myself and the contractor. I took on the responsibility of creating and submitting the house plans, the plot plan and the documentation for the engineered trusses and beams. My contractor was responsible for the documentation for the trusses and beams that I submitted to the city.
While not everyone has the time or skills to tackle this aspect of the project just remember that permits are essential and need to be considered at the very early stages of your project. Speak to your contractor during the interview process and see how they handle permit applications.
6/ The Design Stage
Plans & Renderings
Now for the fun part. I love creating designs and just like my clients, I needed to see this vision come to life on a screen before I could give the go ahead to begin.
I’ve written in the past about the importance of 3D renderings and how they can ease your anxiety. I wanted to be sure that the entire team had understood the vision I had and designing plans and renderings is a guarantee that everyone is on the same page.
I drew the existing structure using the Chief Architect CAD program that I use for my clients. I sent the file to my draftsperson who then added the engineered roof to the deck. From those files we created the PDF documents that were submitted to the city.
Struggles & Challenges

There can be challenges with a renovation even for those of us who work full-time in the design industry. I was surprised to have issues with the permitting process since we had been approved for the existing foundation 25 years ago. I wrongly assumed that the approval would remain in place.
My intention was to submit the floor plan along with some 3D renderings. To my surprise we learned that a plot plan was also required. This involved locating the property pins and hand drawing a scaled plot plan with the existing structure dimensioned from the property line.
Deck Size & Shape

Aside from cost there are a few other factors that will impact the final design. You’ll want to consider all the uses for your deck space. Do you like to entertain? Do you want a quiet, cozy spot to retreat with a book?
You’ll also want to consider the architectural style of your home. This should always be a consideration when updating your home but don’t overlook it when designing your new deck. The style and size of your home should be considered when designing your deck.
In my case, we were working with the previous footprint of our existing deck. The deck size and shape would remain the same but I knew I wanted a roof on this deck so that we could enjoy it regardless of weather or time of day.
Yard Size & Usage
The final consideration should be given to your yard. A deck can infringe on the yard and end up taking a chunk of land if the deck is oversized. Before finalizing your deck design you should consider the current use of your yard. Do you have a pool? Do you have extensive gardens that will be impacted by your new deck?
We have a large backyard but since we weren’t changing the size and shape of the deck we didn’t have to worry about interfering with any of its uses.
I’ve written a detailed post about designing your dream outdoor space. If you’re considering a new deck, read this post before you begin.
7/ The Construction Process
The entire construction process was wrapped up in just 4 weeks on this project. As homeowners it’s important to consider what your role will be. Is there anything you can do to save time and/or money? In our case we undertook small preparations like removing the deck railing and all of the stucco on the exterior wall. We also arranged for a portable toilet to be delivered for the trades to use during the month. Here is a breakdown of work completed by the team over the month:
Week One
Contractor
Scheduled the delivery of the custom trusses and beam.
Cut a hole in the roof and installed engineered trusses and beams.
Sheeted the new roof with plywood.
Repaired some of the existing roof and facia boards where there had been water damage.
Roofers
Removed existing shingles and installed new ones.
Week Two
Contractor
The electrical rough in was created by running wires for new outlets, lighting and security cameras.
City Inspector
Inspected rough framing. We were advised that we would be required to add a 4th ply to the post as well as uplift protection to the post beam connection. Once we addressed these changes, photos were submitted to the inspector and we were cleared to proceed.
Week Three
Homeowners
Painted the siding, inside and outside.
Contractor
Removed the existing patio door and installed a six foot garden door.
Installed custom flashing on the patio door wall.
Installed all facia and soffits.
Installed new siding and battens.
Week Four
Contractor
Reinstalled railings.
Inspector
Final inspection and sign off.
Gemstone Dealer
Reinstalled soffit lighting.
I hope this inspires you to get started on your own deck renovation. If you have any upcoming design projects that you would like to discuss, reach out to me. I’d be happy to see how we can work together and help you navigate the challenges of your own renovation.
Warm regards,
Adrienne